

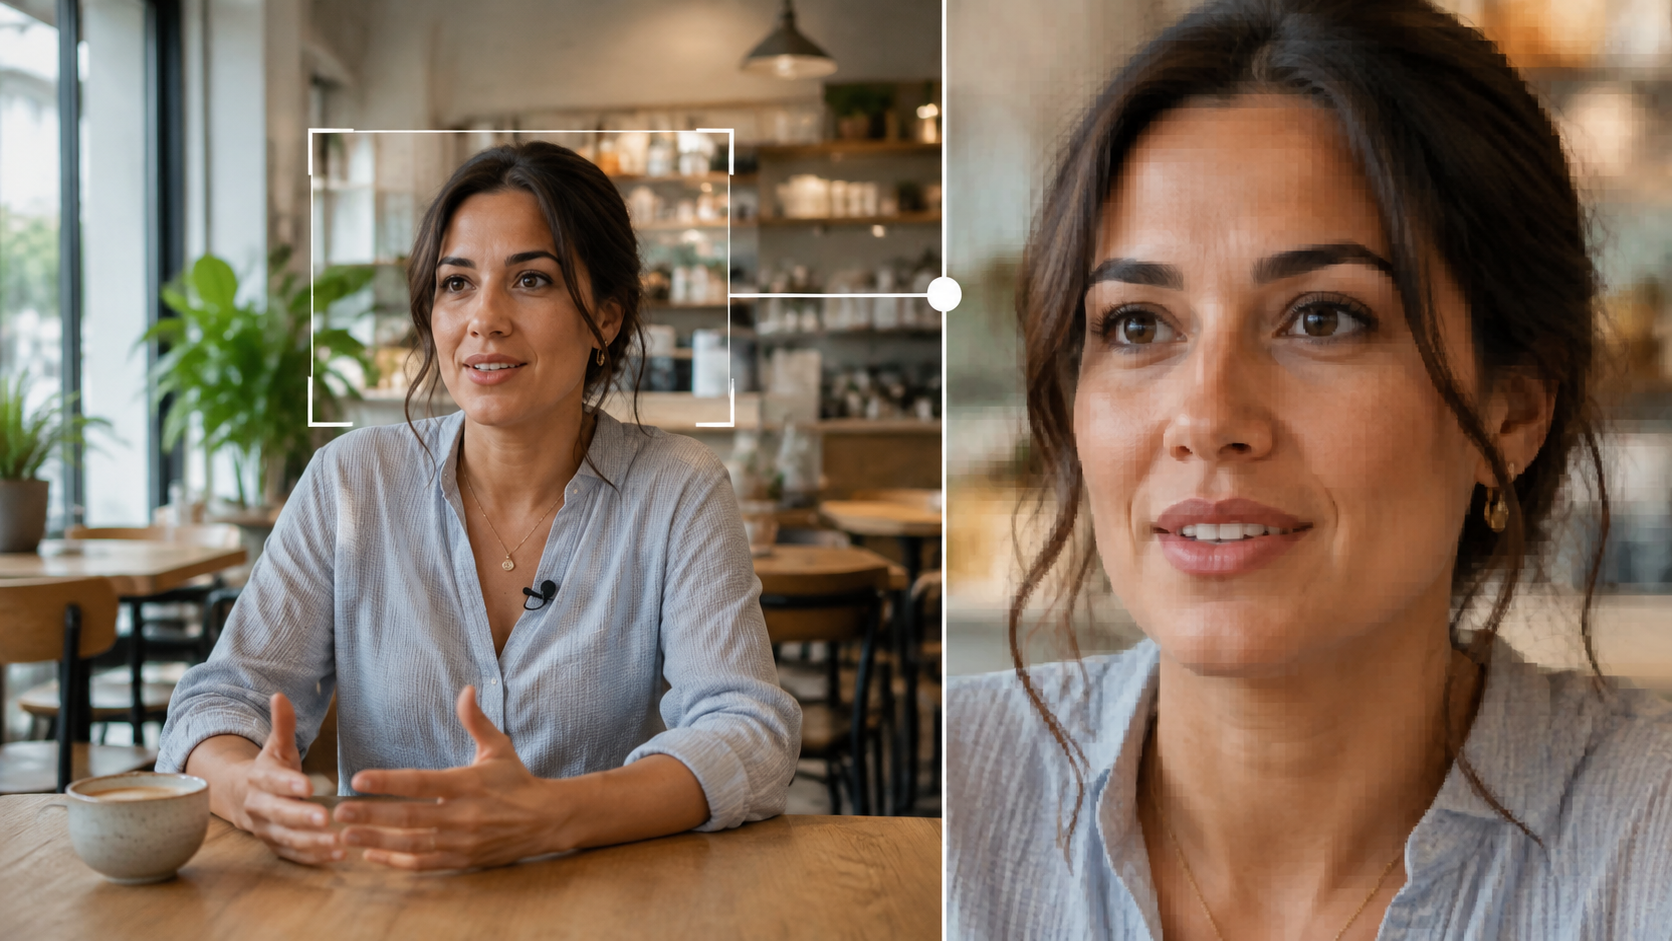
A café interview looks clear in its original wide frame. But after the editor crops around the speaker to make a vertical video, the face becomes soft, the hair starts to flicker, and small blocks appear whenever the person moves.
It may look as if the editing app damaged the clip. In most cases, the crop simply made existing problems easier to see.
If you are wondering how to fix a pixelated video after cropping, do not begin with a strong sharpening filter. First, work out what kind of image information is missing.
Why Cropping Makes Defects More Visible
A 1080p video contains 1920 by 1080 pixels. When you cut a narrow vertical section from the middle, much of the original picture is removed.
A 9:16 crop may leave an image that is only about 608 pixels wide. The editor then stretches it to fill a 1080-pixel-wide vertical frame. The subject becomes larger, but the camera has not captured any new detail.
Zooming produces the same result. At 200% zoom, facial blur, compression blocks, and image noise all become more noticeable.
That is why the original interview may look fine in a small preview while the cropped export looks poor on a phone screen.
Find Out What “Pixelated” Means in Your Clip
Several different problems are often described as pixelation:
- Low resolution: Edges look jagged, text breaks apart, and small facial details are missing.
- Compression damage: Moving areas contain blocks, smearing, or flickering patterns. This is common in clips downloaded from messaging apps or social media.
- Missed focus: The background looks clearer than the speaker. The face was already blurry before the crop.
- Image noise: Small moving speckles appear in dark areas, especially in footage recorded indoors or at night.
Pause on a frame where the speaker is not moving quickly. View it at its actual size and check the eyes, hair, clothing edges, and background shadows.
If the whole face lacks detail, resolution or focus is probably the main issue. If the damage becomes worse during movement, compression is more likely. If the shadows seem to shimmer, you are probably seeing noise.
Making this distinction saves time because each problem needs a different response.
Fix the Problem in the Right Order
1. Look for a Better Source File
Before applying any effect, check where the clip came from.
The original camera file may be much clearer than a copy downloaded from a chat, email, or social platform. These services often reduce file size by removing visual information.
If a 4K version exists, use it. A vertical crop from a 4K frame keeps considerably more detail than the same crop from a 1080p copy.
Replacing the source is usually more useful than trying to repair a heavily compressed version.
2. Reduce the Crop
The speaker does not always need to fill the entire vertical frame. Keeping part of the café table or background can preserve more image quality while still directing attention to the person.
You can also change the crop gradually. Begin with a wider view, then move slightly closer when the speaker reaches an important point. This usually feels more natural than keeping an extreme close-up for the entire clip.
If the subject moves, adjust the crop over time instead of enlarging the whole shot just to keep them centered.
3. Clean Up Visible Damage Gently
If you see blocks or smearing, apply light compression cleanup. If dark areas contain moving speckles, use mild noise reduction.
Avoid trying to make every surface perfectly smooth. Strong cleanup can remove eyelashes, hair, and fabric texture. Heavy sharpening can create bright outlines around the face and make compression marks more obvious.
Make a small adjustment, play the moving section again, and compare it with the original. A cleaner still frame is not helpful if the image flickers during playback.
4. Consider Upscaling Last
Upscaling is worth considering when the best available source is still too small, but the subject remains recognizable and reasonably focused.
After reducing obvious noise and compression damage, you can try Video2x to enlarge the video. Compare the result with the regular cropped version instead of assuming that a larger file must look better.
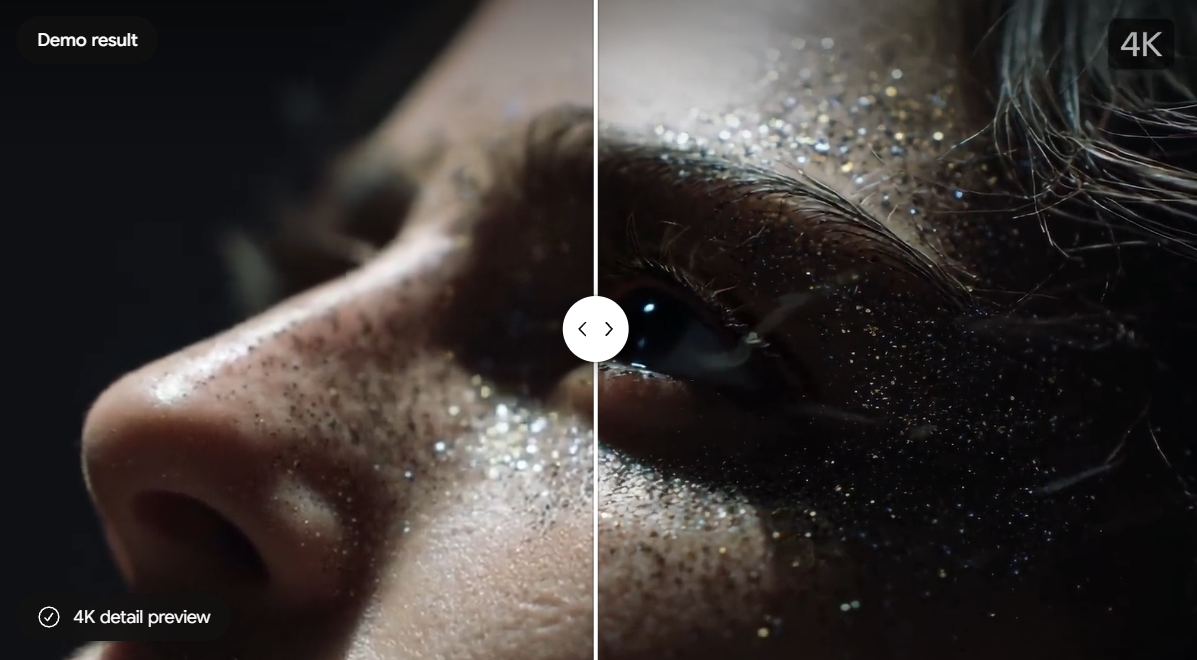
AI may produce cleaner-looking edges or more consistent textures. It cannot know exactly what an unreadable sign, blurred expression, or hidden object originally looked like. Newly generated details should therefore be treated as an interpretation, not as recovered evidence.
A Hypothetical Editing Decision
Consider the café interview again.
The creator has only a 1080p copy, and the original camera file is unavailable. A tight vertical crop makes the speaker’s face soft and reveals blocks around moving hair.
Turning the sharpening slider all the way up would probably make the edges look harsher. Instead, the creator keeps a little more of the table in the frame, reduces the visible compression blocks, and applies only mild noise cleanup.
A moderately enlarged version is then compared with the cleaned original crop. If the enlargement makes the face look unnatural, the creator keeps the wider version.
This is a hypothetical example, not a product test. Its value lies in the order of the decisions: preserve the useful information first and enlarge the image only when necessary.
Check the Final Export
Before publishing, confirm that:
- The crop is no tighter than the story requires.
- The face was reasonably clear in the source footage.
- Noise cleanup has not made skin or clothing look artificial.
- Sharpening has not created glowing or jagged edges.
- The export size and quality match the intended platform.
- The clip has not been repeatedly downloaded and re-exported.
- AI-enhanced faces, text, and product details remain suitable for their intended use.
Watch the exported file from beginning to end on the type of device your audience is likely to use. Pay attention to movement, not only paused frames.
Start With the Source, Not the Filter
When a cropped video looks pixelated, the strongest fix is usually a better source file. If that is unavailable, a wider crop may protect more useful detail.
Compression cleanup and noise reduction should solve specific visible problems rather than cover the entire clip with heavy processing. Upscaling belongs near the end of the workflow.
No tool can perfectly restore information that the camera never recorded. The practical goal is to preserve what remains, avoid enlarging preventable damage, and produce a video that is comfortable to watch.

You must be logged in to post a comment.