
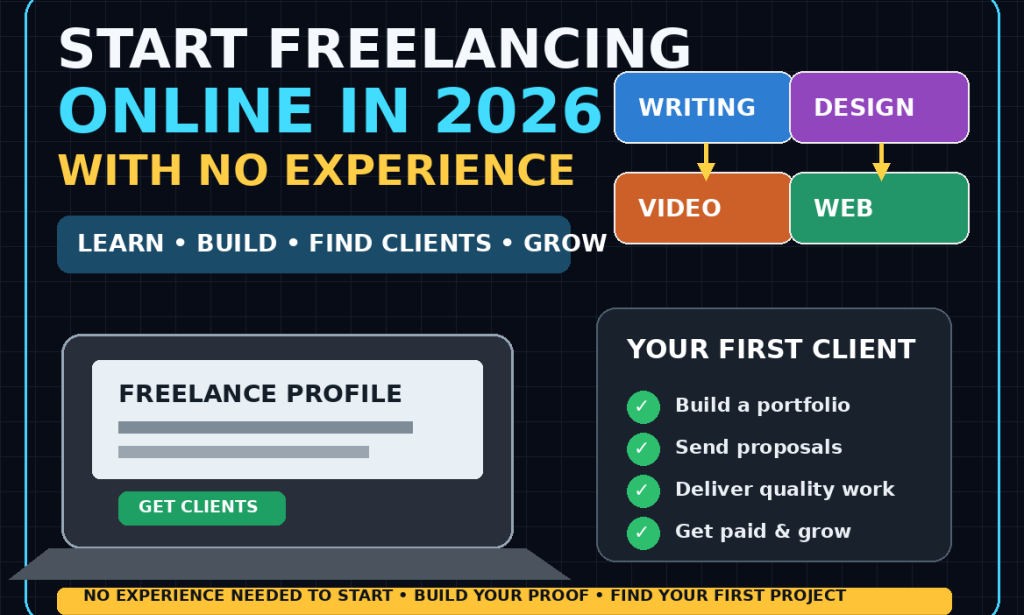
How to Start Freelancing Online in 2026 With No Experience
A Complete Beginner's Step-by-Step Guide
Freelancing has become one of the most accessible ways to start working online.
You don't necessarily need an office, a large business, or years of professional experience.
What you do need is a useful skill, a way to demonstrate that skill, reliable communication, and the patience to find your first clients.
The biggest challenge for beginners is usually the same:
“How can I get a client when nobody has hired me before?”
That is a legitimate problem.
Fortunately, you can solve much of it by building proof of your ability before you have professional clients.
You can create sample projects, build a simple portfolio, start with smaller jobs, collect genuine testimonials, and gradually move toward better-paying work.
This guide explains how to start freelancing online in 2026, even if you are starting from zero.
What Is Freelancing?
Freelancing means providing your skills or services to clients without necessarily working as their permanent employee.
A freelancer might work with:
-
Individuals
-
Small businesses
-
Startups
-
Agencies
-
Nonprofits
-
Publishers
-
Online creators
-
Large companies
Freelancers can work on individual projects, ongoing contracts, or a mixture of both.
Examples include:
-
Writing
-
Graphic design
-
Video editing
-
Web development
-
Virtual assistance
-
Translation
-
Data entry
-
Social media management
-
SEO
-
Illustration
-
Presentation design
-
Customer support
-
Programming
-
Research
-
Audio editing
You don't need to master every skill.
You need to become useful at one specific thing first.
Step 1: Choose One Freelance Skill
One of the biggest mistakes beginners make is trying to offer everything.
You might be tempted to write:
“I do writing, graphic design, websites, social media, marketing, video editing, data entry and anything else you need.”
That doesn't communicate expertise.
Instead, choose one starting skill.
For example:
Blog writing
or:
Short-form video editing
or:
Canva social media design
or:
WordPress website setup
or:
Virtual assistance
A focused service is easier to learn, market, and demonstrate.
Step 2: Choose a Skill People Actually Need
Don't choose a skill simply because someone online says it is profitable.
Ask whether businesses and individuals actually need the service.
For example, businesses regularly need help with:
-
Websites
-
Content
-
Marketing materials
-
Videos
-
Customer communication
-
Administrative work
-
Social media
-
Research
-
Design
Look at freelance marketplaces, job boards, business websites, and professional communities.
Search for the service you're considering.
Look at what clients are asking for.
This gives you a better understanding of real demand.
Step 3: Start With a Narrow Service
Instead of:
“I am a graphic designer.”
try:
“I design social media graphics for small businesses.”
Instead of:
“I am a writer.”
try:
“I write SEO-friendly blog articles for technology websites.”
Instead of:
“I edit videos.”
try:
“I edit short-form videos for creators and small businesses.”
Specific services make it easier for potential clients to understand exactly what you can do.
Step 4: Learn the Basics for Free
You don't need to spend hundreds of dollars before starting.
There are countless free educational resources available online.
You can learn through:
-
Free tutorials
-
Documentation
-
Online courses
-
YouTube lessons
-
Practice projects
-
Blogs
-
Community discussions
-
Free software
-
Public examples
Your objective isn't to know everything.
Your objective is to become capable of completing a specific type of job.
Step 5: Practice Before Looking for Clients
Don't wait for your first client to give you experience.
Create your own practice projects.
If you want to become a writer, write sample articles.
If you want to become a designer, create sample designs.
If you want to edit videos, edit sample footage.
If you want to become a web developer, build sample websites.
If you want to become a virtual assistant, create sample spreadsheets, schedules, or administrative systems.
These projects become evidence of your ability.
Step 6: Build a Portfolio Without Having Clients
This is one of the most important strategies for beginners.
You can create a portfolio using spec work or self-initiated projects.
For example, imagine you want to design restaurant menus.
Choose a fictional restaurant and create a menu design.
Then create:
-
A logo
-
Menu
-
Social media graphic
-
Promotional flyer
You now have examples of what you can produce.
Be transparent that these are sample projects.
Never pretend that a fictional project was created for a real client.
Step 7: Create 3–5 Strong Samples
You don't need 50 projects.
Start with three to five excellent examples.
Quality is more important than quantity.
Your portfolio should immediately answer:
What can you do?
What does your work look like?
Who could benefit from it?
How can someone contact you?
Keep it simple.
Step 8: Create a Simple Portfolio
Your portfolio doesn't need to be complicated.
You can use:
-
A simple website
-
An online portfolio platform
-
A document
-
A shared folder
-
A professional profile
-
A freelance marketplace profile
Your portfolio should include:
Introduction
Who you are and what you do.
Services
What you offer.
Work Samples
Examples of your work.
Process
How you work with clients.
Contact
How clients can reach you.
Step 9: Create a Professional Profile
Your online profile is often the first thing a potential client sees.
Use a clear profile picture if appropriate.
Write a simple headline.
For example:
Short-Form Video Editor for Creators and Small Businesses
Then explain:
-
What you do
-
Who you help
-
What type of work you specialize in
-
What makes your approach useful
Avoid filling your profile with exaggerated claims.
You don't need to say you're the world's best freelancer.
Show what you can actually do.
Step 10: Choose Where to Find Clients
There are several ways to find freelance work.
You can use:
-
Freelance marketplaces
-
Professional networking platforms
-
Remote job boards
-
Company websites
-
Online communities
-
Social media
-
Direct outreach
-
Personal referrals
-
Existing contacts
You don't need to use every platform.
Choose two or three methods and become consistent.
Step 11: Understand Freelance Marketplaces
Freelance marketplaces can connect clients with freelancers.
The exact platforms, fees, rules, and available features vary, so always check the current terms before signing up.
When creating a marketplace profile, focus on:
-
Specific services
-
Relevant skills
-
Strong examples
-
Clear descriptions
-
Professional communication
Don't copy another freelancer's profile.
Create your own.
Step 12: Start With Smaller Projects
Your first goal isn't necessarily to land a huge contract.
It is to get real experience.
Small projects can help you learn:
-
Client communication
-
Deadlines
-
Revisions
-
File delivery
-
Scope management
-
Pricing
-
Professional expectations
Once you've successfully completed several projects, you can start pursuing larger opportunities.
Step 13: Don't Work for Free Forever
There is a difference between:
creating free sample work
and
working for free for clients indefinitely.
Creating samples helps demonstrate your ability.
Doing unlimited unpaid client work can prevent you from building a sustainable business.
If you decide to do a free or discounted project, understand why you're doing it and define the scope clearly.
Step 14: Set an Introductory Price
When you're new, you may not know exactly what to charge.
Start by researching what similar freelancers charge for comparable work.
Consider:
-
Your skill level
-
Project complexity
-
Time required
-
Client requirements
-
Revisions
-
Industry
-
Market
-
Your operating costs
Don't automatically choose the cheapest price.
Being cheap does not guarantee clients.
A better strategy is to offer a clearly defined service at a reasonable introductory rate.
Step 15: Charge for the Work, Not Just the Time
A freelancer's value isn't always directly connected to the number of hours spent.
For example, an experienced designer might complete a project in two hours that takes a beginner six hours.
That doesn't mean the experienced freelancer should automatically charge less.
Clients are paying for the result and expertise, not simply the number of minutes you spent.
As your skills improve, your pricing can improve too.
Step 16: Learn How to Write a Proposal
A proposal shouldn't be a giant autobiography.
A good proposal should demonstrate that you understand the client's problem.
For example:
Hi, I read your project description and understand that you need short videos edited for social media. I can help turn your raw footage into concise, engaging clips with clean cuts, captions, and formatting for your chosen platforms.
I've attached a few relevant examples of my work.
I can start with the first batch and deliver according to the agreed schedule.
Keep it relevant.
Step 17: Personalize Your Proposals
Don't send exactly the same proposal to every client.
Mention something specific about their project.
For example:
I noticed that you want the videos optimized for vertical viewing.
That shows you've actually read the request.
A generic:
“Dear Sir/Madam, I am the best freelancer and can do this perfectly.”
is unlikely to stand out.
Step 18: Don't Apply to Everything
You don't need to send 100 random applications every day.
Look for projects that match:
-
Your skills
-
Your portfolio
-
Your experience
-
Your availability
-
Your preferred type of work
A smaller number of highly relevant applications can be more useful than hundreds of generic ones.
Step 19: Learn to Identify Good Clients
Not every client is worth working with.
Watch for warning signs such as:
-
Unclear project requirements
-
Unrealistic deadlines
-
Constant scope changes
-
Requests for extensive unpaid work
-
Pressure to move payment outside a protected system
-
Requests for sensitive information
-
Promises of huge money for almost no work
Trust your judgment.
If something feels seriously wrong, step away.
Step 20: Watch Out for Freelance Scams
Unfortunately, people looking for online work can be targeted by scams.
Be cautious if someone:
-
Requests money before giving you work
-
Promises guaranteed high income
-
Asks you to buy cryptocurrency
-
Requests gift cards
-
Sends suspicious payment instructions
-
Asks for unnecessary sensitive information
-
Wants you to cash a suspicious cheque
-
Pressures you to act immediately
-
Asks you to download unknown software
A legitimate client shouldn't need to manipulate you into paying them to receive work.
Step 21: Keep Communication Professional
You don't have to sound like a corporate executive.
Just be clear.
Instead of:
“ok”
say:
“Thanks for confirming. I'll send the first draft by Friday.”
Instead of disappearing when you're delayed:
“I'm running slightly behind schedule. I'll need until tomorrow to complete the final version.”
Good communication can make a huge difference.
Step 22: Clarify the Project Before Starting
Before you begin, make sure you understand:
-
What needs to be delivered
-
How many items are included
-
Deadline
-
File format
-
Number of revisions
-
Payment terms
-
Special requirements
If something isn't clear, ask.
A five-minute clarification can prevent hours of unnecessary work.
Step 23: Define Revisions
One common beginner mistake is unlimited revisions.
A client may say:
“Can you make a few changes?”
Then another change.
Then another.
Eventually the original project becomes completely different.
Define the number of revisions included in the agreed scope.
If the client requests significant additional work, discuss the new scope before continuing.
Step 24: Meet Your Deadlines
If you say:
“I'll deliver Friday.”
try to deliver Friday.
Reliability can become one of your strongest competitive advantages.
Clients don't only want talented freelancers.
They want people who:
-
Respond
-
Understand instructions
-
Meet deadlines
-
Communicate clearly
-
Deliver consistently
Step 25: Ask for a Testimonial
After completing a project successfully, ask whether the client would be willing to provide a short testimonial.
For example:
I'm glad you're happy with the final result. If you have a moment, would you be willing to leave a short review about your experience working with me?
Only use genuine testimonials.
Don't manufacture reviews.
Step 26: Turn One Client Into Repeat Work
A first project can become much more valuable if the client needs ongoing help.
For example:
A writer might move from one article to four articles every month.
A designer might move from one logo to ongoing social media graphics.
A video editor might move from one video to a monthly editing package.
After delivering good work, ask:
Would you like help with similar projects in the future?
You don't need to be pushy.
Step 27: Create Service Packages
Once you understand your service, packages can make buying easier.
For example:
Basic
1 short video
Standard
5 short videos
Premium
10 short videos + captions + thumbnails
Packages help clients understand what they're getting.
They also make your services easier to scale.
Step 28: Improve One Skill at a Time
Don't try to learn everything simultaneously.
If you're a writer, improve:
-
Research
-
Structure
-
Headlines
-
Editing
-
SEO
-
Storytelling
If you're a designer, improve:
-
Typography
-
Layout
-
Color
-
Branding
-
Composition
Deepening one useful skill can make you more valuable.
Step 29: Use AI as a Tool, Not a Replacement for Skill
In 2026, freelancers can use AI tools to improve productivity.
For example, AI can help with:
-
Brainstorming
-
Research organization
-
Drafting
-
Summarization
-
Transcription
-
Idea generation
-
Administrative tasks
-
Workflow automation
But don't blindly submit AI-generated work.
Review everything.
Check facts.
Add your own judgment.
Make sure the final result actually meets the client's requirements.
Your value should come from the result you provide, not simply from pressing a button.
Step 30: Build a Repeatable Workflow
Once you start getting projects, create a standard process.
For example:
Client enquiry
↓
Project discussion
↓
Scope confirmation
↓
Price and deadline
↓
Payment/contract according to agreed terms
↓
Work begins
↓
First draft
↓
Revision
↓
Final delivery
↓
Feedback
↓
Follow-up
A repeatable process makes freelancing much less chaotic.
Step 31: Keep Records
Keep organized records of:
-
Projects
-
Client requirements
-
Agreements
-
Invoices
-
Payments
-
Deadlines
-
Deliverables
-
Expenses
The exact tax and business record requirements depend on where you live, so check the rules applicable to your location.
Don't wait until your freelance income becomes large before taking organization seriously.
Step 32: Create a Separate Work System
If possible, keep your freelance work organized separately from your personal life.
Use folders such as:
Clients
→ Client A
→ Client B
→ Client C
And:
Invoices
Portfolio
Templates
Completed Projects
This makes it easier to find files when you need them.
Step 33: Build Your Reputation
Your reputation becomes more valuable as you gain experience.
Aim to become known for something.
For example:
Reliable blog writer for technology companies
or:
Fast short-form video editor for creators
or:
Simple website designer for small businesses
Specialization can help people remember you.
Step 34: Increase Your Rates Gradually
You don't have to charge your beginner rate forever.
As you gain:
-
Experience
-
Better samples
-
Testimonials
-
Repeat clients
-
Stronger skills
-
Faster workflows
you can review your pricing.
You may eventually discover that your best clients are willing to pay significantly more for quality and reliability.
Step 35: Don't Depend on One Platform
A freelance marketplace can be useful.
But don't build your entire career around one platform.
Over time, develop multiple ways to find work.
For example:
Marketplace + professional network + personal website + referrals
That gives you more control.
Step 36: Build Relationships
Freelancing is not just about submitting applications.
Talk to people.
Participate in relevant communities.
Share useful work.
Connect with professionals in your industry.
Help others when you can.
A future client may come from someone who remembers you months later.
Step 37: Create Content Around Your Skill
If you're a designer, share design tips.
If you're a writer, share writing advice.
If you're a developer, share useful development lessons.
If you're a video editor, show editing examples.
This demonstrates expertise before someone even contacts you.
Your content becomes another part of your portfolio.
Step 38: Learn From Rejection
You will probably get rejected.
That's normal.
A client may choose someone else because:
-
Their budget is different
-
Another freelancer has more experience
-
Their portfolio is a better match
-
They already know someone
-
The project changed
Don't automatically interpret rejection as:
“I'm not good enough.”
Instead ask:
“What can I improve?”
Then keep going.
Step 39: Focus on Your First $100, Not Your First $10,000
Large income goals can feel overwhelming.
Break them down.
First:
Get your first client.
Then:
Complete the project successfully.
Then:
Get your first testimonial.
Then:
Get a repeat client.
Then:
Improve your pricing.
Then:
Build a reliable pipeline.
Small milestones create momentum.
Step 40: Build a Long-Term Freelance Business
Freelancing can eventually grow beyond individual projects.
You could eventually:
-
Specialize
-
Raise your rates
-
Create packages
-
Build recurring contracts
-
Hire subcontractors where appropriate
-
Build an agency
-
Sell digital products
-
Teach your skill
-
Create a personal brand
-
Build your own business
You don't have to decide all of this on day one.
Start with one useful service.
A Simple 30-Day Freelancing Plan
If you're starting from zero, here's a practical roadmap.
Week 1: Choose and Learn
Day 1: Choose one skill.
Day 2: Research what clients need.
Day 3: Find free learning resources.
Day 4: Study the fundamentals.
Day 5: Practice.
Day 6: Practice again.
Day 7: Review your work.
Week 2: Build Your Portfolio
Day 8: Choose a sample project.
Day 9: Create it.
Day 10: Improve it.
Day 11: Create a second sample.
Day 12: Create a third sample.
Day 13: Organize your portfolio.
Day 14: Create your professional profile.
Week 3: Start Looking for Clients
Day 15: Identify suitable platforms and communities.
Day 16: Search for relevant projects.
Day 17: Send personalized applications.
Day 18: Improve your proposals.
Day 19: Apply to more relevant projects.
Day 20: Connect with potential clients or professional contacts.
Day 21: Review what is working.
Week 4: Improve and Repeat
Day 22: Improve your portfolio.
Day 23: Improve your profile.
Day 24: Send more targeted applications.
Day 25: Practice your skill.
Day 26: Follow up appropriately.
Day 27: Create another sample or useful piece of content.
Day 28: Review your results.
Day 29: Identify your biggest weakness.
Day 30: Create your next 30-day plan.
Beginner Freelancing Checklist
-
Choose one skill
-
Research market demand
-
Learn the fundamentals
-
Practice regularly
-
Create 3–5 portfolio samples
-
Build a simple portfolio
-
Create a professional profile
-
Choose suitable platforms
-
Learn how proposals work
-
Apply to relevant projects
-
Communicate professionally
-
Confirm project requirements
-
Set clear deadlines
-
Define revisions
-
Deliver quality work
-
Ask for genuine testimonials
-
Build repeat-client relationships
-
Track income and expenses
-
Watch for scams
-
Continue improving your skill
Common Freelancing Mistakes
Trying to Learn Everything
Focus on one service first.
Waiting Until You're Perfect
You can improve while building your career.
Having No Portfolio
Create samples if you don't have client work.
Sending Generic Proposals
Show that you understand the specific project.
Charging Too Little
Don't compete solely on price.
Accepting Every Client
Some clients aren't worth the stress.
Missing Deadlines
Reliability matters.
Doing Unlimited Revisions
Define project boundaries.
Ignoring Scams
Never send money to receive supposedly guaranteed freelance work.
Giving Up After a Few Rejections
Finding the first client can take time.
Final Thoughts
Starting freelancing with no experience can feel difficult because of the classic problem:
You need experience to get clients, but you need clients to get experience.
The solution is to create your own proof.
Learn a useful skill.
Build sample projects.
Create a portfolio.
Start with realistic opportunities.
Apply selectively.
Communicate professionally.
Deliver excellent work.
Ask for genuine feedback.
Then use that experience to pursue better opportunities.
You don't need to become a successful freelancer overnight.
Your first goal is simply to become useful enough that someone is willing to pay you for a specific result.
Once you achieve that, you have something much more valuable than a certificate or a collection of tutorials.
You have your first piece of real-world experience.
From there, you can improve your skills, build your reputation, increase your rates, find better clients, and eventually turn freelancing into a serious online career.
Start small, stay consistent, and focus on becoming genuinely good at one thing.

You must be logged in to post a comment.