
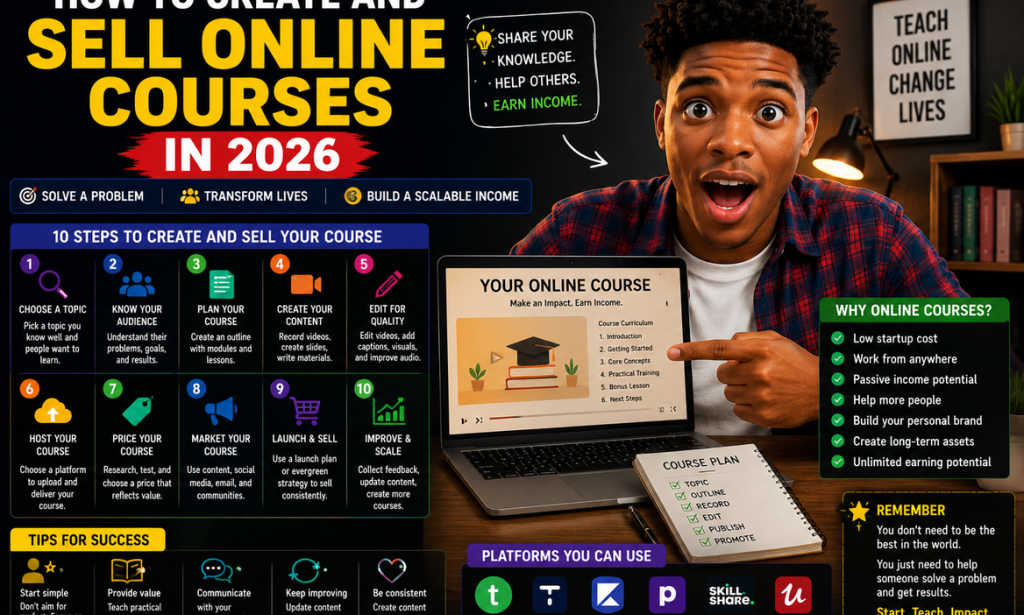
How to Create and Sell Online Courses in 2026
A Complete Beginner's Guide
Creating an online course can turn knowledge you already have into a product that can reach people anywhere.
You don't need to be a university professor or a famous expert.
If you know how to solve a specific problem and can explain the solution clearly, you may be able to create a useful course.
The challenge is not simply recording videos.
A successful course needs a clear audience, useful lessons, good organization, an easy learning experience, and a practical way to reach potential students.
Here's how to get started.
Step 1: Choose Something You Know Well
Start with a subject you understand.
It could be:
-
Graphic design
-
Cooking
-
Photography
-
Writing
-
Business
-
Fitness
-
Language learning
-
Music
-
Career skills
-
Crafts
-
Education
-
Personal development
Choose something you can explain through practical examples.
Step 2: Solve One Specific Problem
Avoid trying to teach everything.
Instead of:
Learn Everything About Photography
try:
How to Take Better Smartphone Photos for Beginners
A specific outcome makes the course easier to design and market.
Step 3: Identify Your Ideal Student
Ask:
Who needs this course?
Think about their:
-
Experience level
-
Goals
-
Problems
-
Questions
-
Available time
-
Budget
A course for complete beginners should not assume advanced knowledge.
Step 4: Decide the Result
Your student should know what they can accomplish after completing the course.
For example:
By the end of this course, students will be able to create and publish their first professional portfolio.
A clear result helps you decide what belongs in the course.
Step 5: Research Existing Courses
Look at other courses covering similar subjects.
Don't copy them.
Study:
-
What they teach
-
How they organize lessons
-
What students like
-
What students complain about
-
What topics appear to be missing
Look for ways to make your course more useful.
Step 6: Create a Course Outline
Break the subject into modules.
For example:
Module 1
Getting Started
Module 2
Essential Skills
Module 3
Practical Exercises
Module 4
Common Mistakes
Module 5
Final Project
An outline keeps the course organized.
Step 7: Keep Lessons Focused
Avoid putting everything into one enormous lesson.
Break information into manageable sections.
A student should be able to understand:
What am I learning?
Why does it matter?
What should I do next?
Step 8: Choose Your Course Format
Your course could contain:
-
Video lessons
-
Screen recordings
-
Slides
-
Worksheets
-
Checklists
-
Assignments
-
Quizzes
-
Downloadable resources
You don't have to use every format.
Choose what helps students learn the subject.
Step 9: Record Your Lessons
You can begin with equipment you already have.
Depending on the course, you may need:
-
Smartphone
-
Computer
-
Microphone
-
Camera
-
Screen-recording software
-
Quiet room
Good teaching matters more than having the most expensive equipment.
Step 10: Improve Your Audio
Students can tolerate simple visuals.
Poor audio is much harder to tolerate.
Record in a quiet environment and test your microphone before recording the entire lesson.
Step 11: Create Useful Visuals
Use demonstrations whenever possible.
For example, if you're teaching design, show the design process.
If you're teaching spreadsheets, show the spreadsheet.
If you're teaching photography, demonstrate the technique.
Showing is often more effective than simply explaining.
Step 12: Don't Make Your Course Longer Just to Make It Look Valuable
A 30-minute course that solves a problem can be more useful than a 10-hour course full of unnecessary information.
Focus on results rather than length.
Step 13: Add Practical Exercises
Give students something to do.
Exercises might include:
-
Creating a project
-
Completing a worksheet
-
Practicing a skill
-
Answering questions
-
Building a portfolio
-
Completing a challenge
Practice helps turn information into skills.
Step 14: Create Downloadable Resources
Useful resources can include:
-
Checklists
-
Templates
-
Worksheets
-
Guides
-
Example files
-
Reference sheets
These can make the course more practical.
Step 15: Review the Entire Course
Before publishing, go through the course as if you're a student.
Ask:
-
Is anything confusing?
-
Are instructions clear?
-
Are lessons in the right order?
-
Are there missing steps?
-
Are the examples useful?
Fix problems before launch.
Step 16: Choose Where to Sell Your Course
You can use an established course platform or another suitable online selling system.
When comparing platforms, consider:
-
Pricing
-
Transaction fees
-
Course hosting
-
Student management
-
Payment options
-
Marketing features
-
Customization
-
Analytics
Don't choose a platform simply because it's popular.
Choose one that fits your needs.
Step 17: Decide Your Course Price
Pricing depends on:
-
Course depth
-
Student outcome
-
Your expertise
-
Audience
-
Competition
-
Included resources
-
Support provided
A short beginner course may have a different price from an extensive professional training program.
Step 18: Don't Automatically Choose the Cheapest Price
Low pricing doesn't guarantee more customers.
Instead, communicate the value clearly.
Explain:
-
What students will learn
-
What problem you'll solve
-
What resources are included
-
What result they can work toward
Step 19: Consider a Beta Launch
Before launching to everyone, invite a small group of students.
Offer the course at an introductory price in exchange for honest feedback.
This can help you identify problems before a larger launch.
Step 20: Collect Student Feedback
Ask students:
-
What was most useful?
-
What was confusing?
-
What lesson should be improved?
-
What would you like to learn next?
Use feedback to improve future versions.
Step 21: Create a Course Sales Page
Your sales page should explain:
-
The problem
-
The solution
-
Who the course is for
-
What students will learn
-
What's included
-
Course price
-
Frequently asked questions
Avoid making unrealistic promises.
Step 22: Show the Course Benefits Clearly
Don't only list features.
Instead of:
10 video lessons
explain:
10 practical lessons designed to help beginners build their first portfolio.
Connect features to outcomes.
Step 23: Create a Free Sample
A free lesson, tutorial, checklist, or guide can help potential students understand your teaching style.
Make the free material genuinely useful.
Step 24: Build an Audience
You don't need millions of followers.
You need people who are interested in the problem your course solves.
You can build an audience through:
-
Social media
-
YouTube
-
Blogging
-
Email newsletters
-
Podcasts
-
Online communities
Step 25: Teach Before You Sell
Share useful information related to your course.
For example, if your course teaches photography, publish photography tips.
People can see your knowledge before deciding whether to buy.
Step 26: Use Content to Promote Your Course
One course can provide many content ideas.
You could create:
-
Short tips
-
Tutorials
-
Common mistakes
-
Before-and-after examples
-
Frequently asked questions
-
Student success stories
Your free content can introduce people to your paid course.
Step 27: Build an Email List
An email list can help you communicate directly with interested people.
You could send:
-
Educational tips
-
New lessons
-
Course announcements
-
Student stories
-
Special offers
Follow applicable email and privacy requirements.
Step 28: Consider a Launch
A launch gives you a specific period to promote the course.
For example:
Week 1: Introduce the problem
Week 2: Share free educational content
Week 3: Announce the course
Week 4: Open enrollment
You can adjust the schedule to suit your audience.
Step 29: Offer a Clear Reason to Buy
People need to understand why your course is worth paying for.
Show them:
-
The problem it solves
-
The skills they'll develop
-
The resources included
-
The time it can save
-
The practical outcome
Be honest about what the course can and cannot accomplish.
Step 30: Create a Student Support System
Depending on the course, support could include:
-
Email
-
Discussion community
-
Q&A sessions
-
Comments
-
Office hours
You don't necessarily need to provide unlimited one-on-one support.
Set clear expectations.
Step 31: Protect Your Course Content
Don't assume everything you publish online is automatically protected from unauthorized copying.
Use appropriate platform controls and clearly communicate your terms.
If your course becomes commercially significant, consider getting professional legal advice about intellectual-property protection.
Step 32: Keep Your Course Updated
Information changes.
Review your course periodically.
Update:
-
Outdated examples
-
Broken links
-
Old screenshots
-
Incorrect information
-
Outdated recommendations
Keeping your course current can improve its value.
Step 33: Create Additional Courses
Once your first course is successful, you can create related courses.
For example:
Course 1: Beginner Photography
Course 2: Smartphone Photography
Course 3: Photography Editing
The courses can serve the same audience.
Step 34: Create a Learning Path
You can eventually organize courses into levels:
Beginner → Intermediate → Advanced
This gives students a reason to continue learning from you.
Step 35: Consider Bundles
You could combine related courses into a bundle.
For example:
Complete Beginner Design Bundle
This may give students more value while increasing the potential value of each customer.
Step 36: Don't Promise Guaranteed Results
Avoid statements such as:
"This course will make you rich."
or:
"You'll definitely get a job after completing this course."
Outcomes depend on many factors.
Promise what you can control: the quality and scope of your teaching.
Step 37: Build Credibility Honestly
You can demonstrate credibility through:
-
Experience
-
Demonstrations
-
Student feedback
-
Portfolio work
-
Qualifications when relevant
-
Helpful free content
Never invent credentials or testimonials.
Step 38: Learn From Other Teachers
Study good educators.
Pay attention to:
-
How they explain concepts
-
How they structure lessons
-
How they demonstrate ideas
-
How they keep students engaged
Then develop your own teaching approach.
Step 39: Track Your Numbers
Monitor:
-
Course sales
-
Revenue
-
Refunds
-
Marketing costs
-
Student completion
-
Feedback
-
Conversion rates
These numbers can help you identify what needs improvement.
Step 40: Improve the Course Instead of Immediately Creating Another One
If your first course isn't selling well, don't automatically create five more.
First ask:
-
Is the topic in demand?
-
Is the audience clear?
-
Is the offer understandable?
-
Is the price appropriate?
-
Does the sales page explain the value?
-
Are enough people seeing the course?
Fix the foundation first.
Step 41: Create a Simple 30-Day Plan
Week 1
Choose your topic.
Define your audience.
Identify the problem you'll solve.
Week 2
Create your outline.
Prepare lessons.
Create worksheets and resources.
Week 3
Record and edit the course.
Upload the lessons.
Create your sales page.
Week 4
Launch to your audience.
Collect feedback.
Fix problems.
Improve the course.
Step 42: Think Long Term
A course can become part of a larger online business.
For example:
Free content
↓
Email audience
↓
Online course
↓
Advanced course
↓
Coaching or services
↓
Digital products
Each part can support the others.
Final Thoughts
Creating and selling an online course in 2026 doesn't require you to be the world's greatest expert.
You need useful knowledge, a clear audience, and the ability to help people achieve a specific result.
Start with one problem.
Build a focused course.
Teach clearly.
Give students practical exercises.
Create useful resources.
Choose a suitable platform.
Promote your course honestly.
Listen to student feedback.
Then improve and expand.
Your first course doesn't have to be perfect.
It needs to be useful.

You must be logged in to post a comment.